LAURA GIBSON
Architecture & Design
DIGITAL DESIGN M2
SUBTRACTIVE & ADDITIVE, SURFACE & WAFFLE
Subtractive & Additive Processes
Matrix


Iteration 1
Iteration 2
Iteration 3
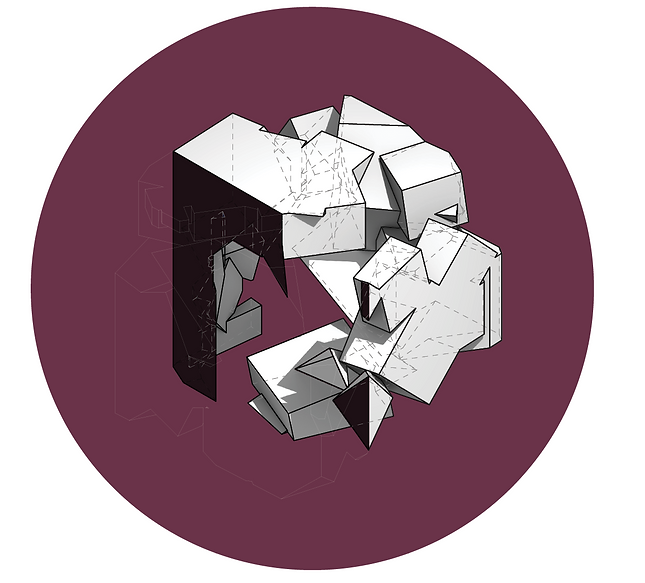
Iteration 1 explored the idea of a hollow centre through the manipulation of conditionals along a curve. The intersecting geometry is an area of interest, and is therefore explored further in iteration 2 and 3, yet with more control over parameters.
Iteration 2 expands the concept of intersecting geometries to make the shapes craft the open space. The angles of the geometry intersect to create various levels to the geometry.
The final iteration combines both iteration 1 and 2 to create a space with a concealed hollow centre. The angular shapes seem to float around the central space unlike iteration 2, creating an area of privacy in the centre.
Script
The code explores the idea of spatiality, particularly creating geometry which rotates around a central shape. Through using cubes, the script utilises a box grower to grow the shapes outwards towards attractor points. The shapes then are rotated around the central cube, and conditionals are added to create extra shapes in specific areas that relate to the angles of the geometry. All boxes are then rotated around the central cube, which is then removed to create a hollow centre, which can be seen best in iteration 3 below.

Photography

This scale was selected as it allows for the outer openings to be used as thresholds that lead into the central open space. To create the flat outer surfaces, cubes were rotated around the central opening and then cut into using boolean intersection.
The scale of the geometry allows for sections of the space to be used as seating and areas of play for children. The pavilion structure allows for different programs, which was done through the rotation of shapes which created different angles and openings.
The central opening of the space is created by the geometry almost ‘floating’ around it. This floating effect was created by using the box grower tool and creating rotations from their initial positions with point attractors directing the flow of shapes outwards from the centre.
Section & Waffle Structures


The two iterations that were selected for task B were cut from the same geometry that iteration 3 from part A was cut from. The first shape on the left was selected as it has a large solid section, which could be used to hold the shape down as the part on the right cantilevers. The angles are also significant in this shape, but not so much the smaller angles as the larger, solid parts of the shape. This can be translated into a laser cut design through the use of an XY waflle. The second iteration is the third development from part A, which explores the idea of open space. This is a more challenging geometry to transfer to a laser cut as the hollow centre limits the object to only using contours on the Z plane, otherwise it would just fall apart and have no additional perpendicular supports.
Script

The script for the section and waffle structures works to convert the solid geometry into panels that can be laser cut and then assembled. The third iteration from task A was converted into a contour where the Z plane is divided into slices of 1mm thick material, and then layered together. Gravity ultimately holds this structure together. The second geometry selected for task B is one taken from the same large geometry that iteration 3 was taken from. It utilises strong angular surfaces which can create unique shapes and spaces when laser cut and transferred into a pavilion structure. The script works to contour through the X and Y plane, extrude the curves. The shape is cleaned through eliminating small pieces and disregarding slices that have less than 2 intersections.
Nesting
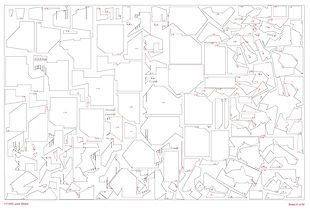
In Grasshopper, all the small sections were eliminated, meaning that the design could be put together more efficiently. However, some pieces are still quite small, yet they are important to the shape of the design and therefore need to be kept.
When nesting the panels, they were rotated and places within the laser cut file so that there was as little wastage as possible, and so that the laser could cut them as close together as possible. Each shape has one edge that will be etched rather than cut to avoid that piece from falling through the mould of the shape when it is cut by the laser, as if it was taped it could cause resin to get stuck to the material. For organisation purposes, each piece has been labelling according to which number it is within its respective planes.


Lasercut photography
.png)


The XY waffle would create a useful shelter as it has a cantilevered section, providing shade as well as an area of privacy. Therefore, the scale selected means that the pavilion will be large enough so that people can stand underneath the cantilever. The angled geometry creates areas of threshold throughout the pavilion, where small angles can be used as more private, secluded areas and the flatter, open areas can be seen as public.
The contour model could be also seen as a much larger scale, such as one where it becomes an entire public space due to the size of the hollow centre. The photographs to the right depict the light conditions that are created by the angled geometry. These light qualities were created through rotating the box growth geometry at varying angles and cropping them so the outside remains flat.